Getting Started
Open API and Webhooks
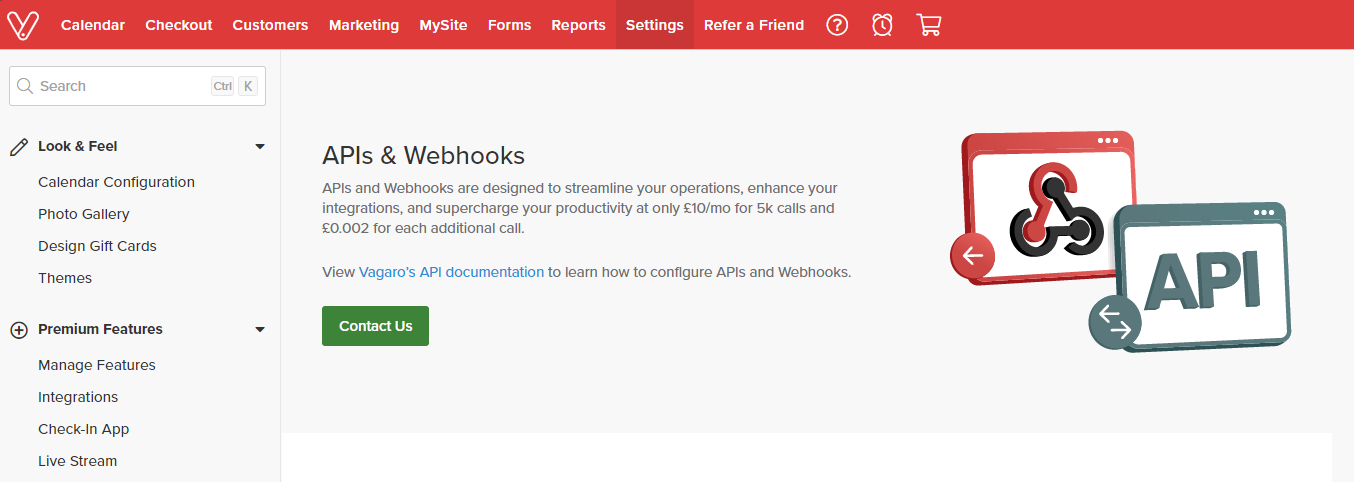
To navigate through the settings, you’ll first need to select "Settings" from the main menu, which allows you to manage various configurations.
Next, under the Developers section, you’ll find and select "APIs & Webhooks", where you can manage the tools and integrations available for developers.
This will open the Webhooks page, where you can view and configure any active webhooks for your system.
If you need further assistance or have any inquiries, simply select "Contact Us", and you'll be directed to a support channel where you can reach out for help.
Here's the link for API and Webhooks
Contact Form
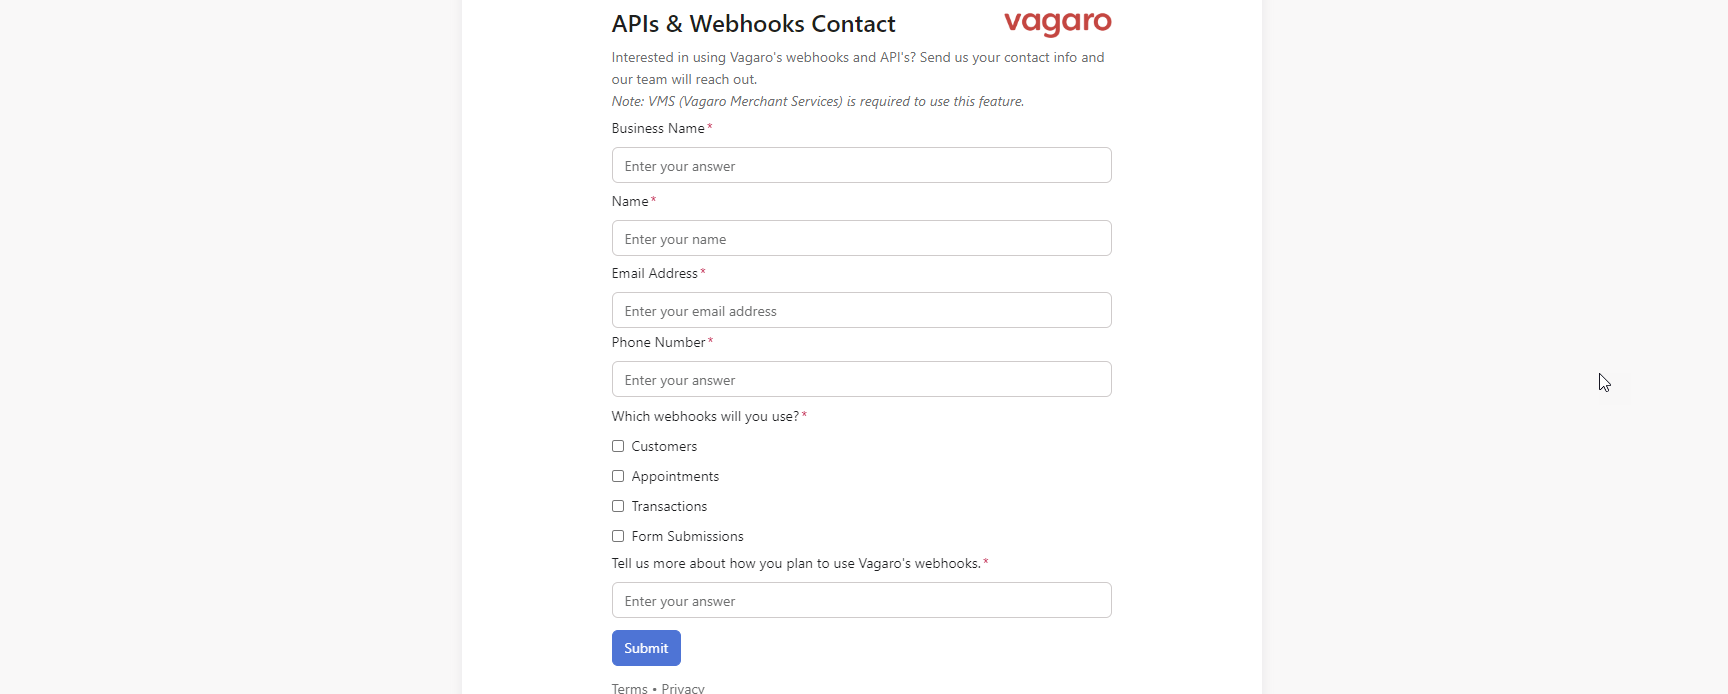
Once you’ve reached the Contact Form, you’ll need to fill in the form with your details, such as your name, email, and the issue or inquiry you’re reaching out for.
After completing all the required fields, simply submit the form to send your request.
From there, you’ll need to wait for about 2 days, as the team at Vagaro will review your submission and communicate with you via email or another preferred method of contact to address your inquiry or provide support.
API and Webhooks Page on Approval
Once your API and webhooks access is approved, the API and Webhooks page will become available to you.
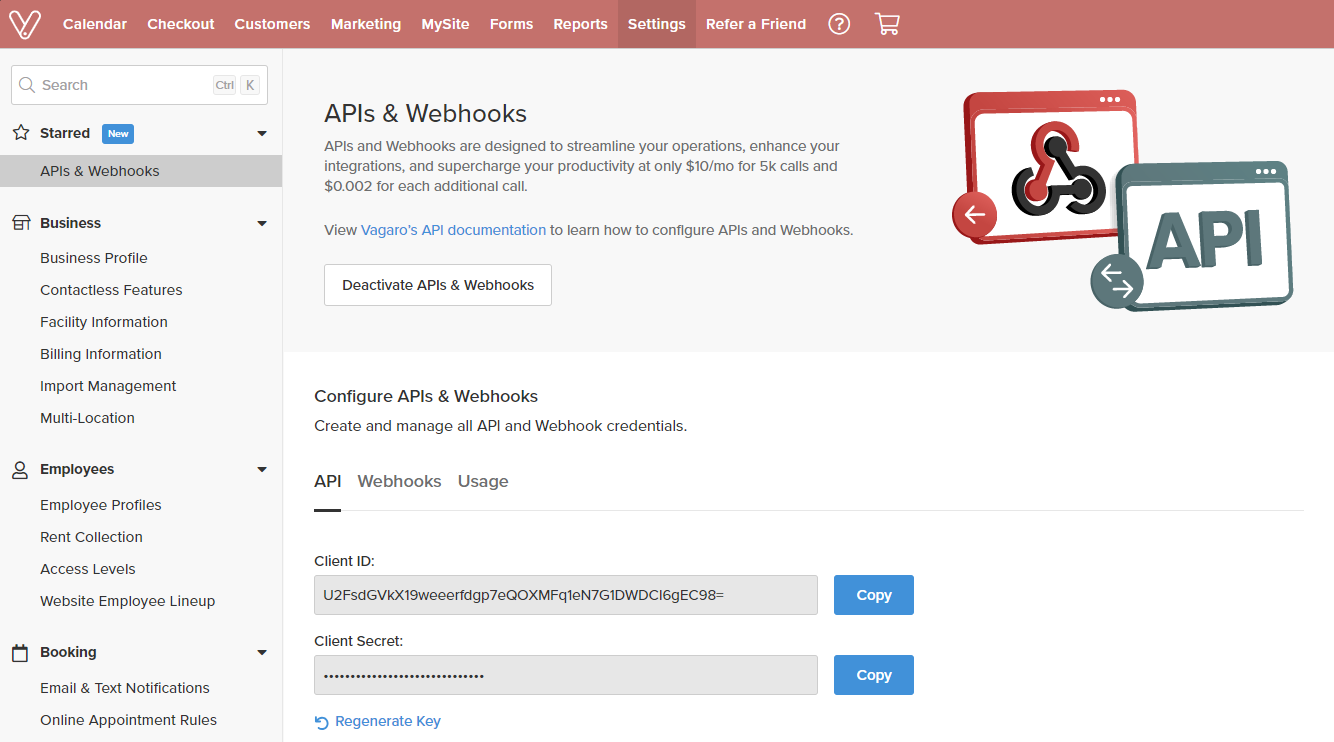
Upon approval, the relevant screen will automatically appear, giving you access to detailed information, settings,
and tools for managing API integrations and webhooks.
From here, you’ll be able to create, view, and configure the webhooks and APIs necessary for your application or
service, ensuring everything is set up according to your needs.
Webhooks Tab
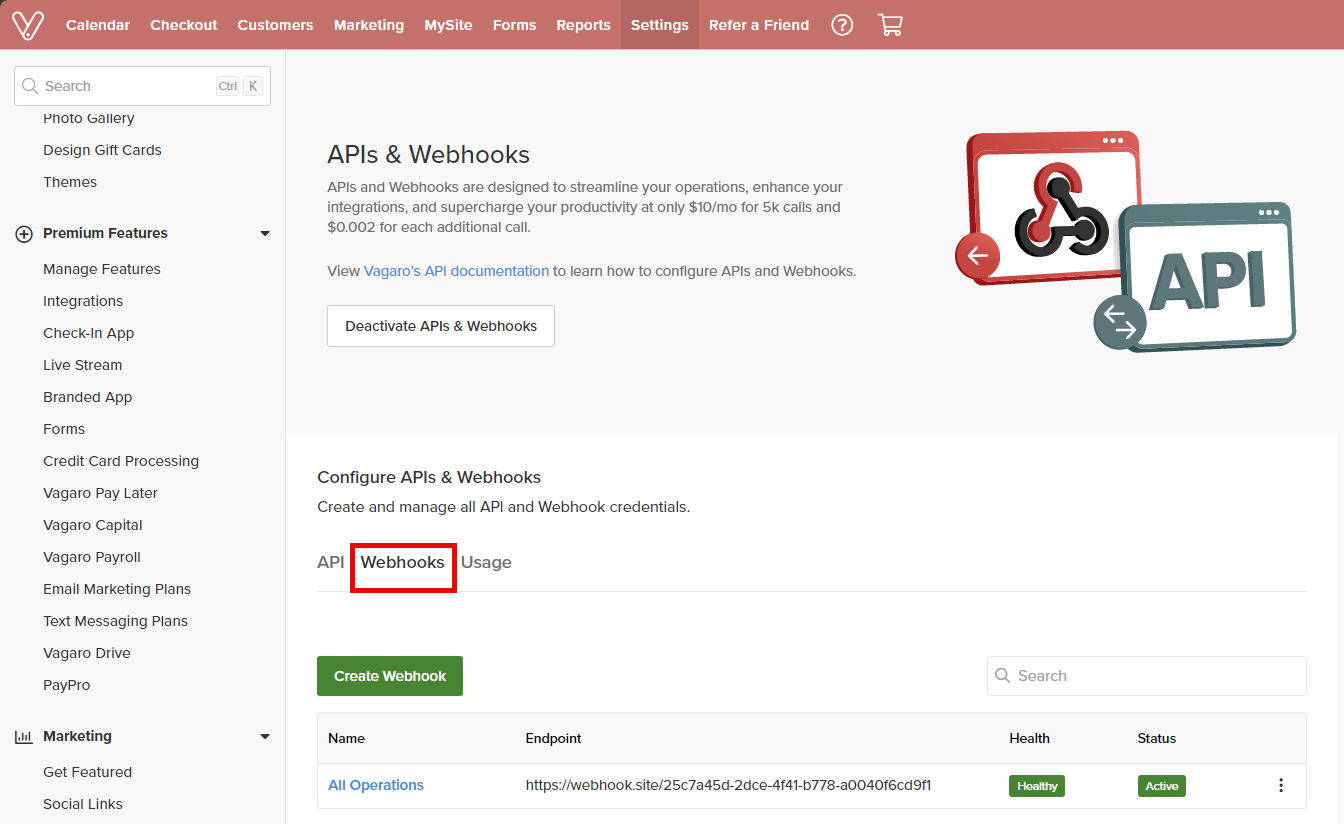
Select Webhooks to access your webhooks.
1. Create Webhook
Select Create Webhook to add a new webhook.
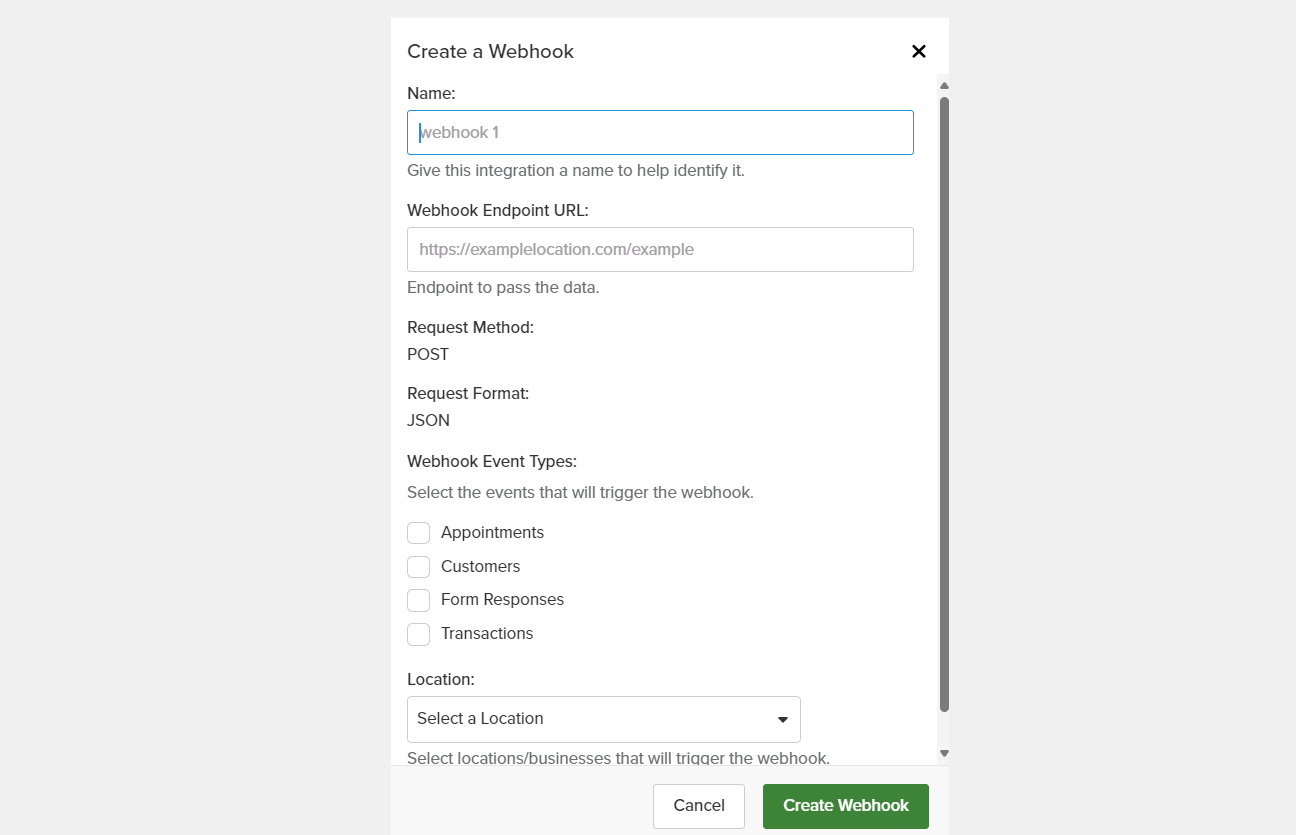
Select Webhook Event Type, then create a webhook for Appointments, Customers, Form Responses, and Transactions. You can choose to create a webhook for all events or just a single one—it's up to you!
Next, select the Location where you want to receive notifications, ensuring you get updates specific to that location.
Once the webhook is created, it will display its health and status, allowing you to monitor its functionality.
You can create up to ten webhooks, but just a heads-up—you can’t set up duplicate ones for the same business.

When you click on the 3-dot button, you’ll see several options available for managing your webhook. These options give you full control over how your webhook operates:
You can choose to View Details to see the webhook's settings and activity or use Test Webhook to ensure its functioning properly.
If you need to make changes, simply select Edit, or if you want to replicate the settings, use Duplicate.
To temporarily stop the webhook, you can Deactivate it, and if it's no longer needed, you have the option to Delete it entirely.
When you click on the 'health' option, it indicates how your previous 20 webhooks have performed.
You can easily activate or deactivate your webhook whenever you need to.

2. View Details
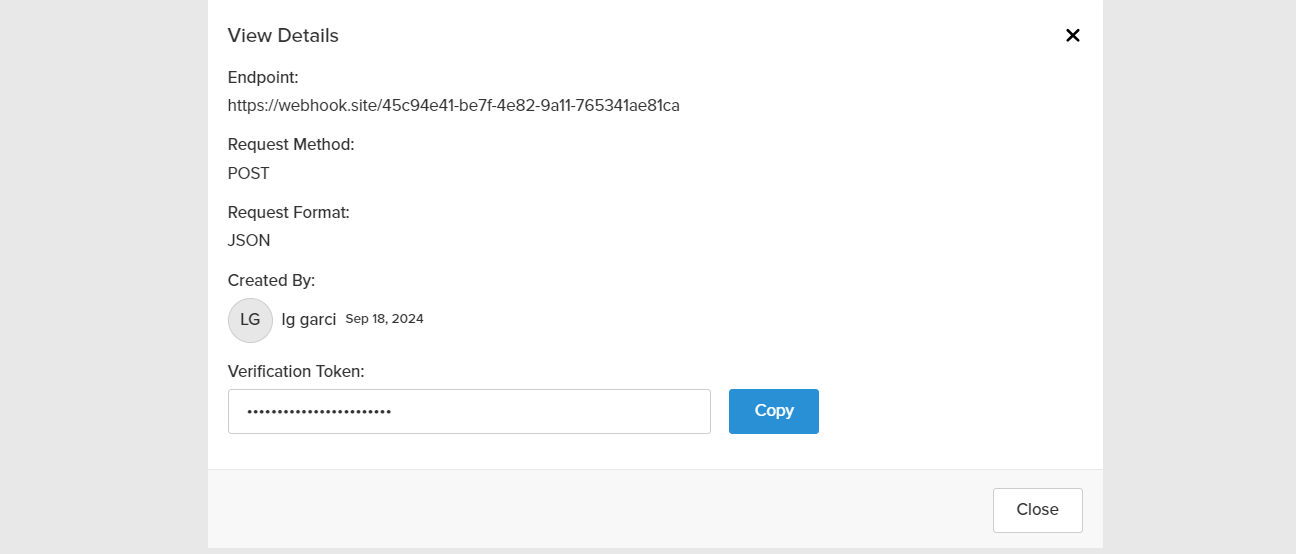
It shows details of the corresponding webhook such as Endpoint, Request Method, Request Format, Created By, Last Updated and Verification Token.
A verification token is used to verify that a webhook is sent by Vagaro.
3. Test Webhook
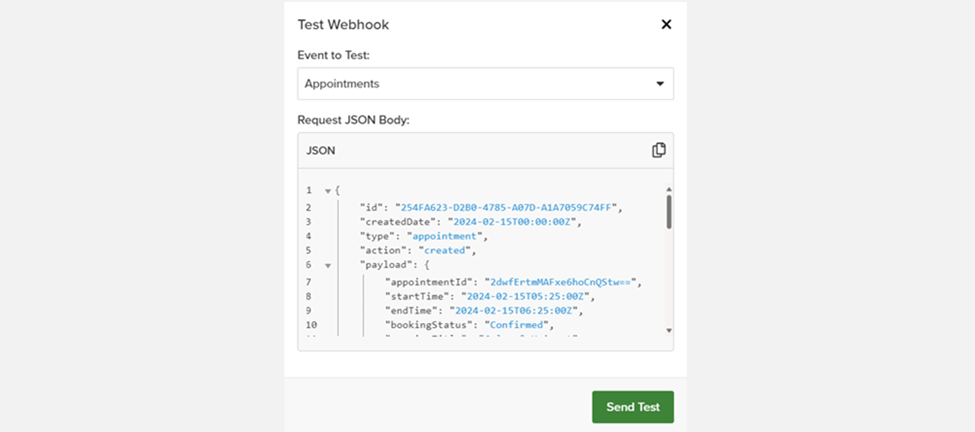
Use this option to test a webhook.
Select the event to be tested in Event to Test. Request JSON body.
4. Edit Webhook
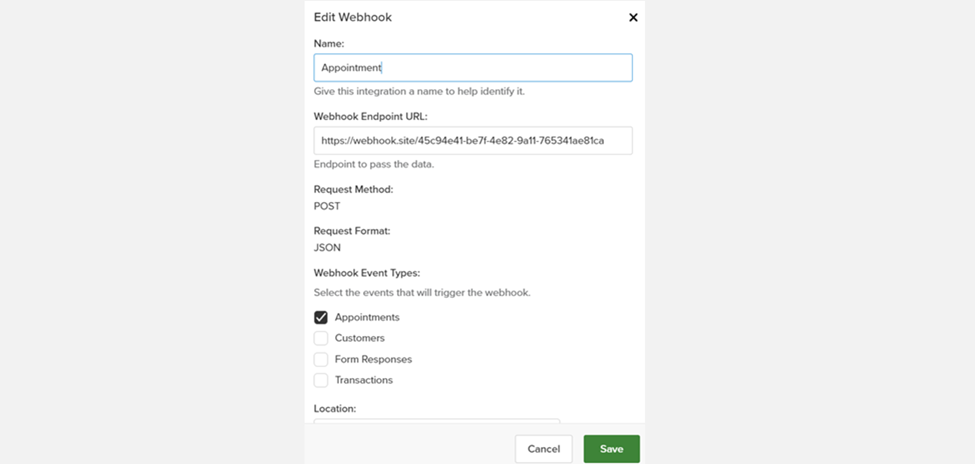
Use this option to edit a webhook.
Update required information and select Save.
5. Duplicate Webhook
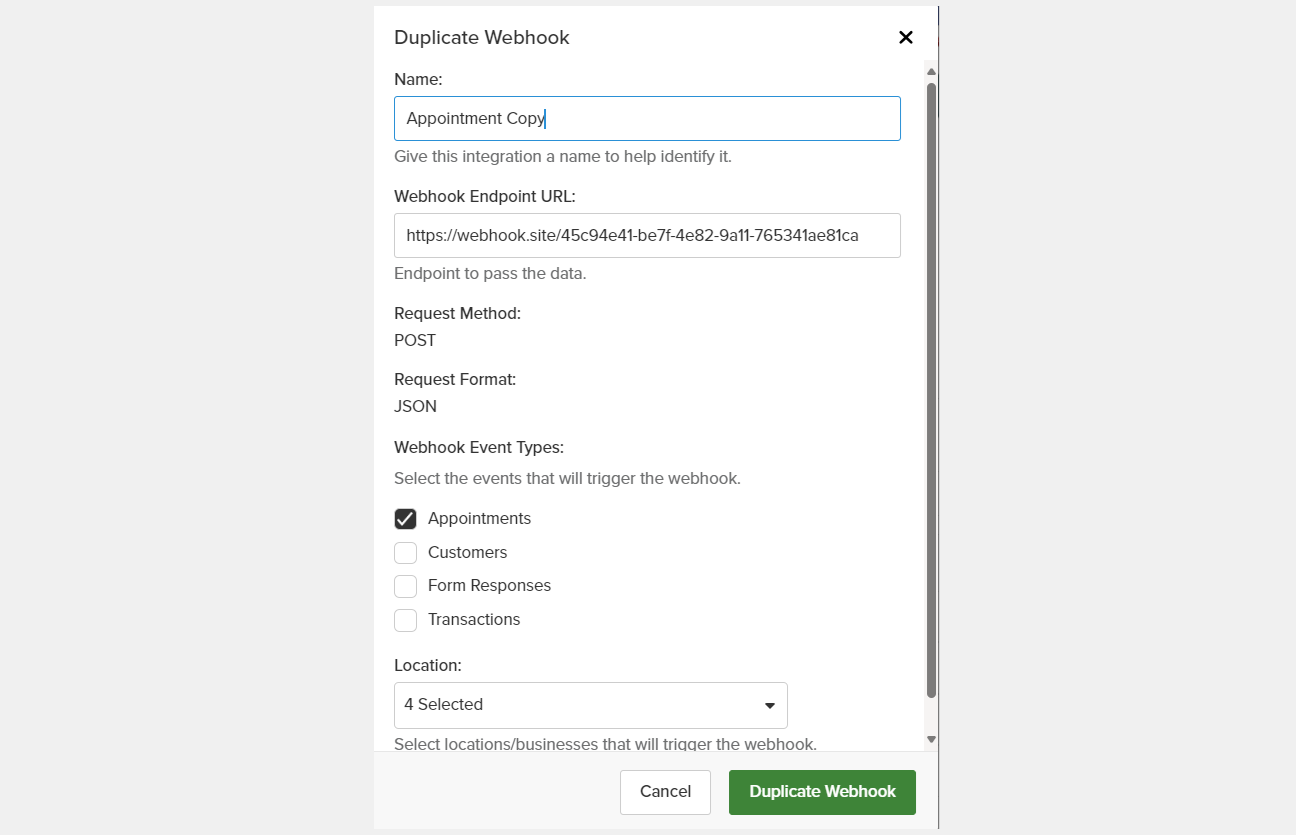
Use this option to duplicate a webhook.
Implementing webhooks with Vagaro is straightforward. Simply provide us with your endpoint URL, configure your event subscriptions, and start receiving real-time notifications. This integration ensures that you always have the latest data to power your business processes and customer interactions.
For detailed setup instructions and additional configuration options, please continue to the sections below.
Updated about 2 months ago